Whats Next?
So You’ve Finished Your Ro/Box Kit 🎉
Posted by
Posted on 8/27/2025
Congrats! If you've successfully completed building your Ro/Box kit, some of you might already be asking, “What do I do next?”
This guide will walk you through the next necessary steps to ensure your Ro/Box kit is ready for action.
1. Power on your Ro/Box
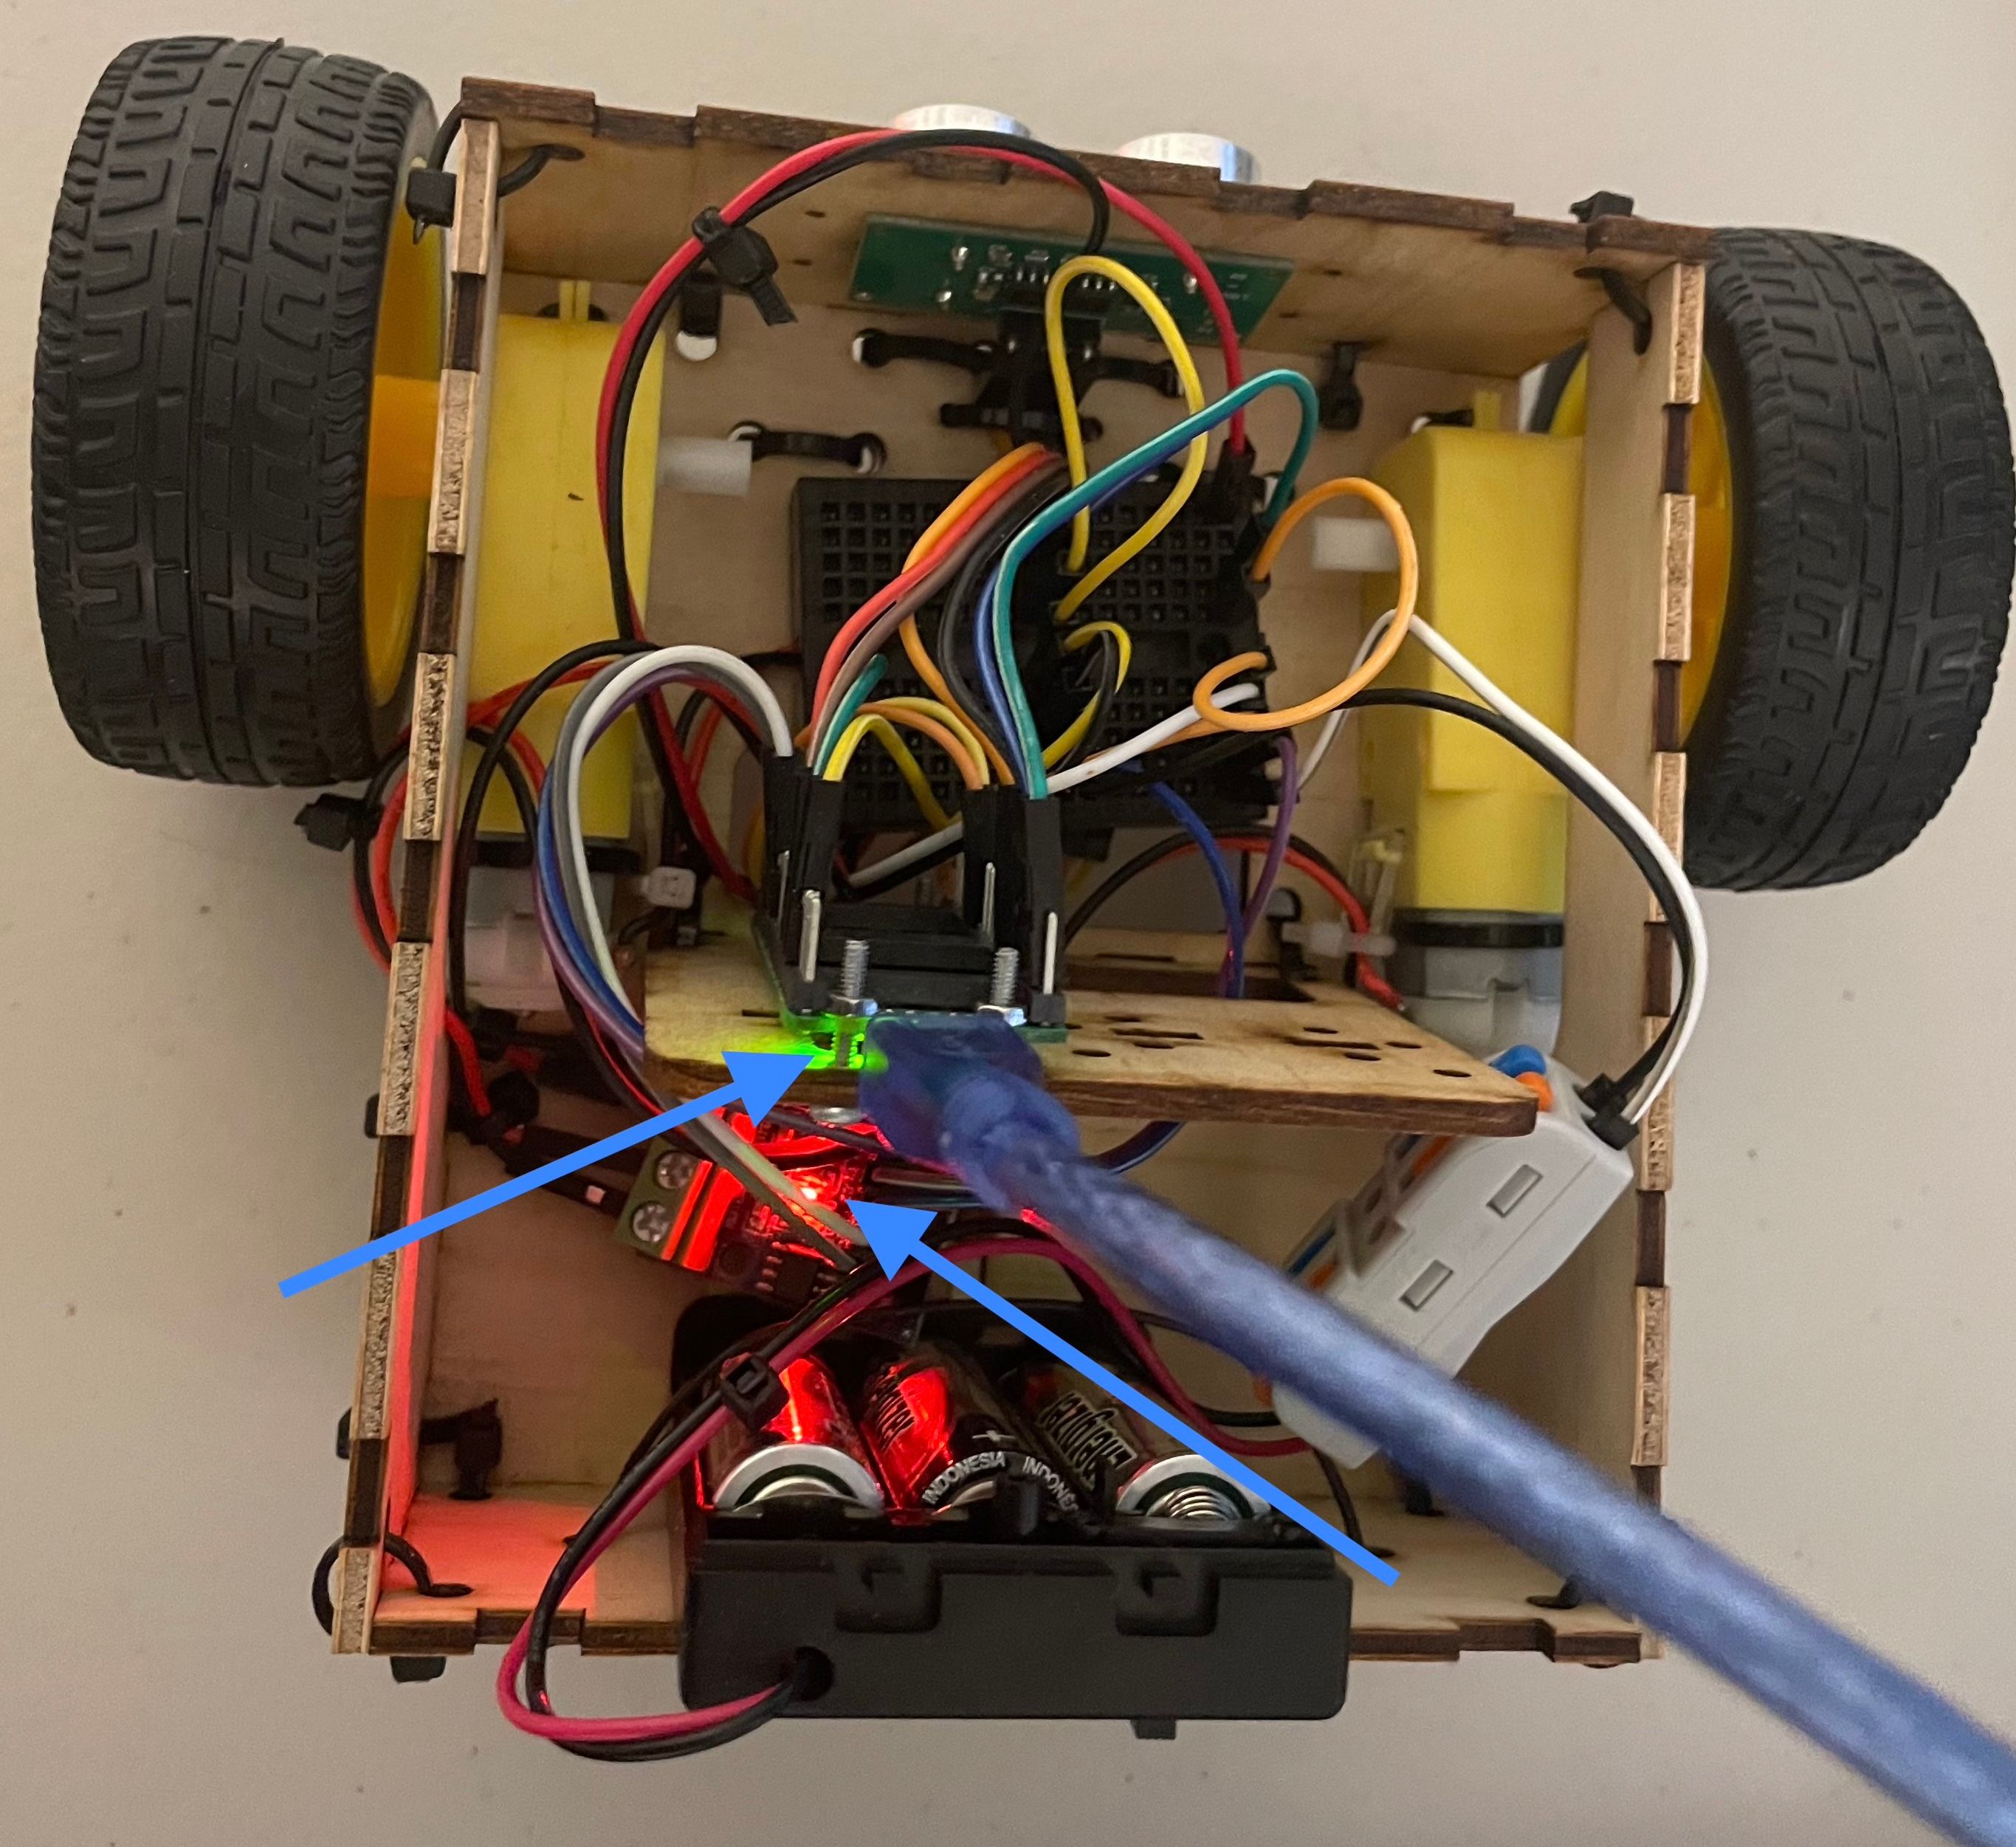
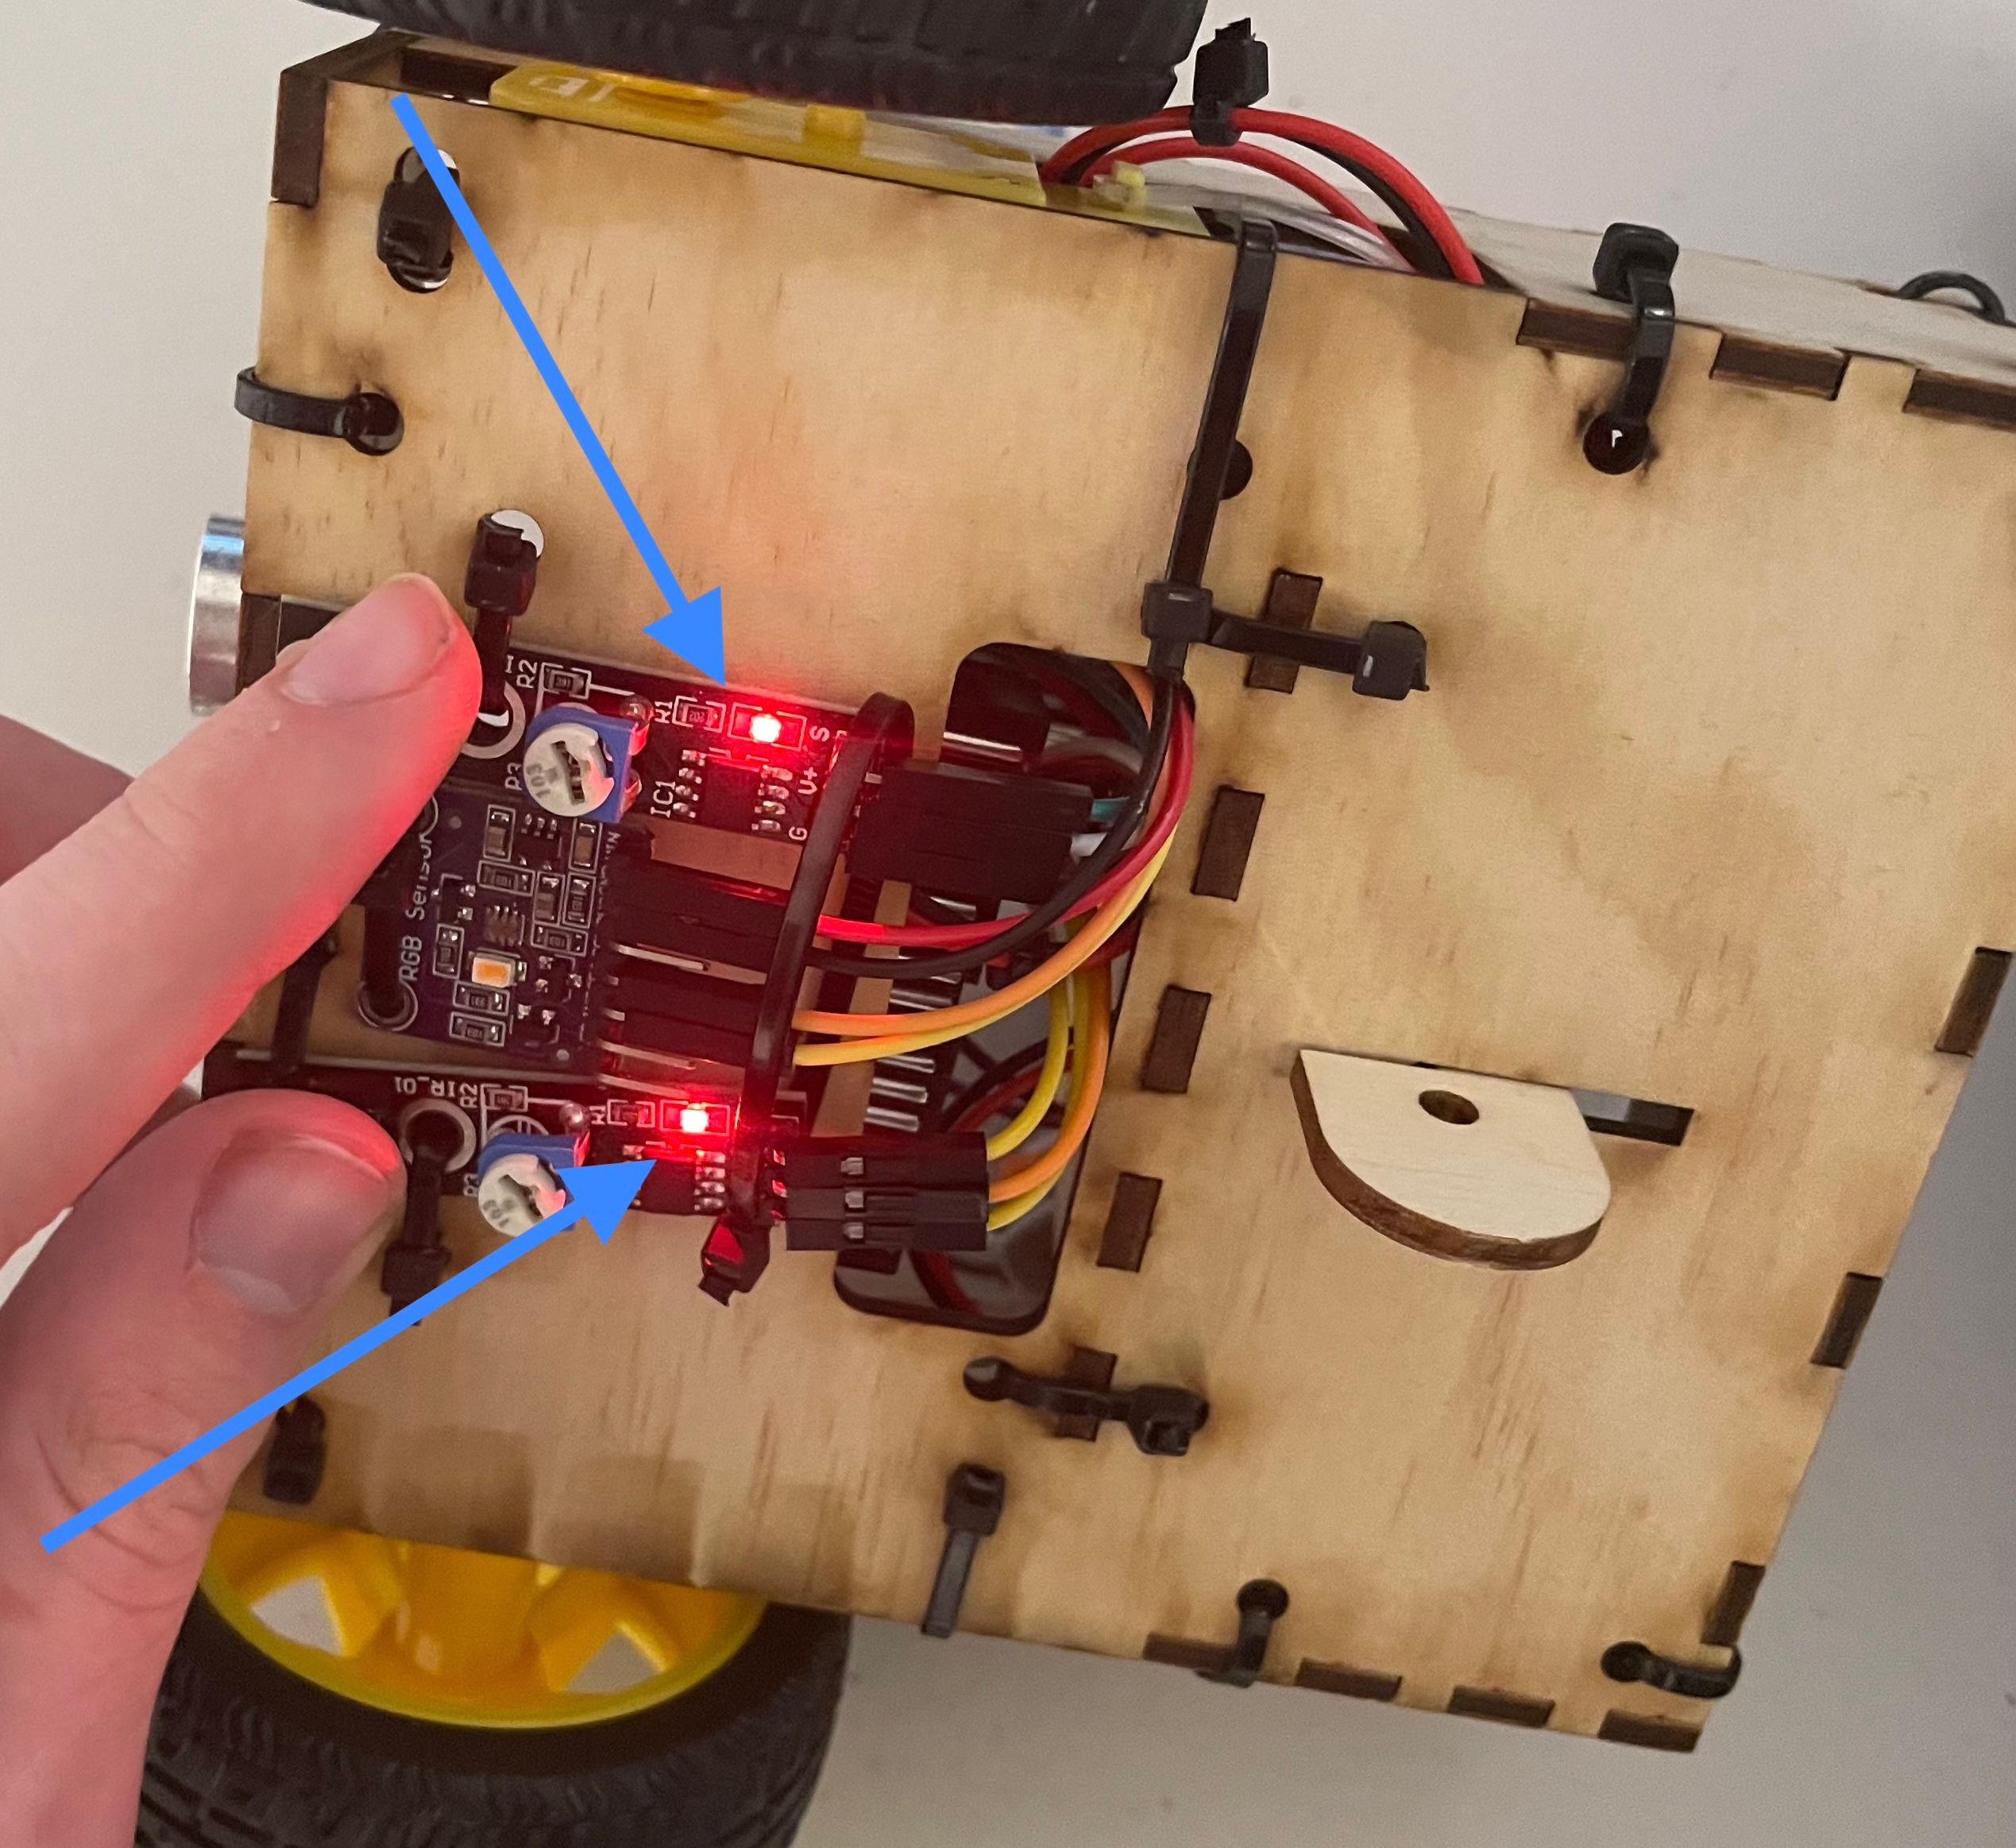
Insert some batteries into the battery pack, and switch it on. If your Ro/Box is wired correctly, you'll see the LED on the Pico and Motor Driver light up. Then, try covering the IR Sensors with your finger: when they're working, they should light up as well.
If the components aren't turning on as expected, don't stress! Try double-checking your wiring against the guide , and make sure each connection is secure. If after any necessary adjustments they all light up, that's great! You've successfully wired your Ro/Box kit.
Wiring Troubleshooting
If double-checking your wiring still isn’t fixing the issue, there are some additional steps you can try.
Typically, if you've wired something incorrectly, it may mean you've caused some wires to short-circuit by causing a connection that shouldn't exist. Don't worry though, the components are durable, and this usually doesn't cause permanent damage. Still, caution should still be taken from possible short circuits, so in the assumption of a short-circuit, so here’s what to do:
- Disconnect the USB from the Pico.
- Wait 1–2 minutes before touching any components. When a short occurs, parts can become hotter than usual.
- Reconnect the USB after reviewing your wiring. If the lights come on, you’re all set!
If it’s still not working, try removing the components one at a time to narrow down the fault. After removing each part, reconnect the Pico and check whether its LED turns on. We recommend removing them in this order:
- Ultrasonic sensor
- Line sensors
- Colour sensors
- Motor driver
When the lights return, it's likely the last component you removed to be the issue.
If you're still experiencing trouble after this, feel free to reach out to us at hello@robox.com.au for assistance, and we'll help you troubleshoot further.
2. Flashing the Ro/Box
Once all the lights are on, the next step is to flash the Ro/Box.
You’ll need:
- A data-transfer USB-C cable
- A computer
- and the latest UF2 file
Steps:
- Find the BOOTSEL button on your Ro/Box kit.
- Hold the BOOTSEL button down while plugging the Ro/Box into your computer.
- If done correctly, a new USB device will appear on your computer.
- If it doesn’t appear: Your cable might only be for charging, not data transfer. Try another cable.
- Once the device appears:
- Manual upload: Drag the provided UF2 file into the device.
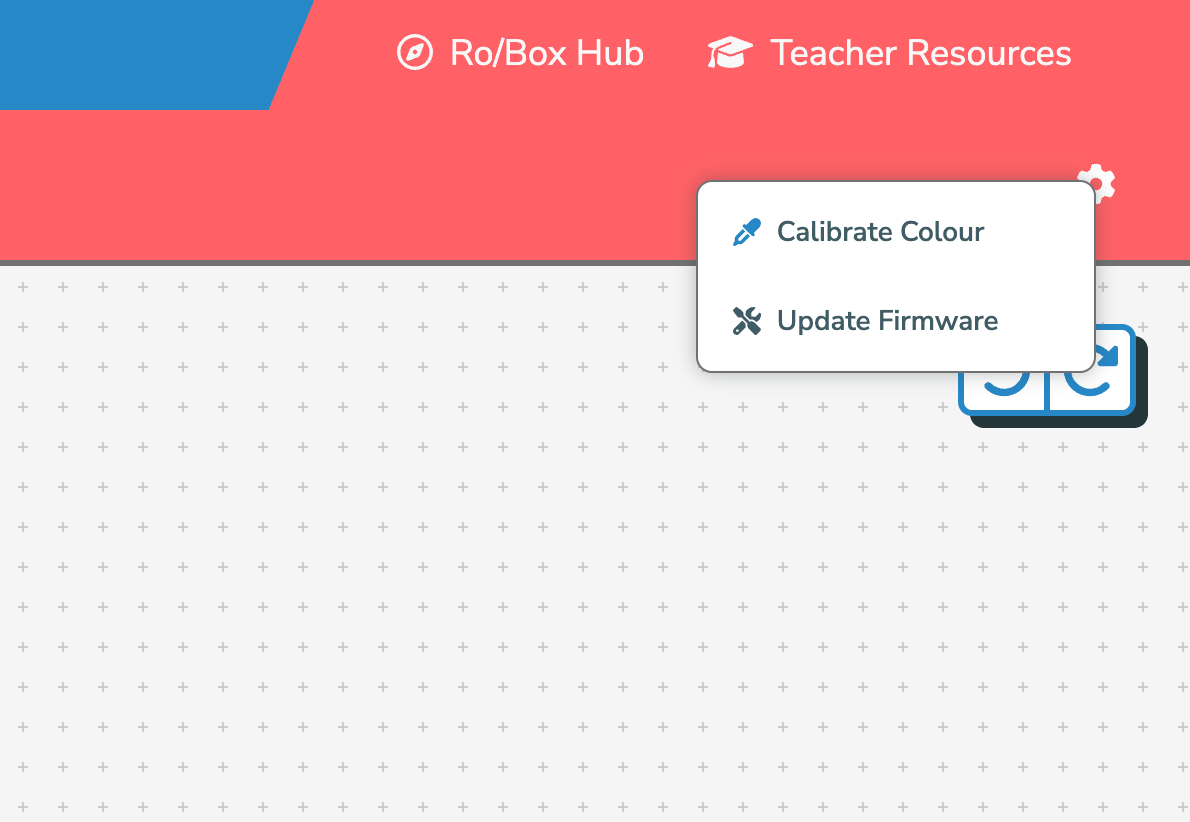
- Automatic upload: Navigate to the settings icon inside the student block-code editor , and click Update Firmware.
- The Ro/Box will disconnect automatically once flashing is done.
3. Calibrating the Line Sensors
Before beginning to code, you’ll need to calibrate the line sensors.
You’ll need:
- A flathead screwdriver
- A surface with black and white areas
Why calibrate?
The line sensors detect black and white differently depending on lighting conditions.
How to calibrate:
- Focus on calibrating one sensor at a time (e.g., the left sensor).
- Use the screwdriver to turn the potentiometer all the way to one side.
- At one extreme, it will detect everything as white (LED on).
- At the other, it will detect everything as black (LED off).
- Slowly turn the potentiometer until for the surface of your choice::
- Over white → LED on
- Over black → LED off
- Repeat for the other sensor.
You want to aim for the LED to switch instantly as you move between black and white.
4. Calibrating the Colour Sensor
To calibrate the colour sensor, head over to the Student Hub and create a project. Please use Chrome as other browsers don't support WebUSB.
- Click the cog icon in the top-left corner.
- Select Calibrate Colour.
- Manual upload: Drag the provided UF2 file into the device.
Conclusion
And that’s it, your Ro/Box kit is ready!
Now, it’s time to start coding, creating, and having fun with your Ro/Box! 🚀